Notice to all:
Starting next Thursday, March 4th the forum will be held in the Old Releif Society room, (other side of the kitchen) we out grew the room we have been meeting in!! There was standing room only-- How exciting!! Please continue to come and bring anyone that is interested. This forum will be on 72 hours kits, bring yours to show. *****A look ahead*** March 11th Randy Anderson will speak to us on Protection for ourselves and our property.
Friday, February 26, 2010
STEVE PETTY GAVE A GREAT FORUM ON STAYING WARM AND DRY IN OUR HOMES AND OUTDOORS.

Steve shared with us the concept of- smaller spaces get warm easier. Therefore, if we stay in place at home and the energy isn't heating our home, we can create a smaller space for ourselves within our homes to warm easier. If we stay at home we feel a sense of security from being in our enviroment and from being around neighbors that we know and trust. Steve told us that some of the ways to create a smaller place is to place two mattress' together to form a mattress "sandwich" to sleep in between. He also said that if we have plastic sheeting and duct tape we can close off a part of our home and heat it with a Mr. Buddy Heater, which runs off of propane tanks. There are other devices designed to use for heat also. If you look at one of the earlier posts, you can learn to make a heater/cooker out of a paint can.
If we are on the move or out of our home, we can use a tent, box, buildings clothes, food, etc to stay warm. Calorie intake, excercise, the sun, space heaters, fires, handwarmers, insulated spaces can all be used to stay warm. We need to drink water even if we are cold and the water is cold, our bodies need water to stay warm! Eating Carbs will help alot, more than protein. Laying clothing is a good method also. We should avoid cotton as it stays wet a long time. Wool and synthetics are better for the cold weather. Wool gloves will keep us warmer than leather or cotton gloves. Wool blankets are the best to use. Steve showed us a "Bivey sack" which he uses to stay warm while on rescue missions. You can purchase them at REI and other places for about $17+. These can be used by themselves or as an addition to our sleeping bags, blankets, etc.

One way to tell if a person is getting to cold and needs warming is to press on their cheek, the color will go out of that spot. If the color stays out for more than a few seconds the person is starting to get hypothermic. Get them warmed up. If a person is already hypothermic try to warm them from the inside out. If they have frostbite don't thaw them unless they can stay thawed. Frostbite is detected by pale, waxy skin.
Here are some tips on staying warm, dry, comfortable and surviving:
Outside
When the weather is extremely cold, and especially if there are high winds, try to stay indoors. Make any trips outside as brief as possible, and remember these tips to protect your health and safety: If you are away from home, make a shelter to get out of the wind and moisture. Snow caves are what Steve uses. If you don't know about snow caves ask us and we will let you know how to make one. You can use a tent, tarp, pine boughs and many other items to build a shelter.
Dress Warmly and Stay Dry
Adults and children should wear:
• a hat
• a scarf or knit mask to
cover face and mouth
• sleeves that are snug at the wrist
• mittens (they are warmer than gloves)
• water-resistant or water-proof coat and boots
• several layers of loosefitting
clothing
Be sure the outer layer of your clothing is tightly woven, preferably wind resistant, to reduce body-heat loss caused by wind. Wool, silk, or polypropylene inner layers of clothing will hold more body heat than cotton. Stay dry—wet clothing chills the body rapidly. Excess perspiration will increase heat loss, so remove extra layers of clothing whenever you feel too warm. Also, avoid getting gasoline or alcohol on your skin while de-icing and fueling your car or using a snow blower. These materials in contact with the skin greatly increase heat loss from the body. Do not ignore shivering It’s an important first sign that the body is losing
heat. Persistent shivering is a signal to return indoors.
Avoid Exertion
Cold weather puts an extra strain on the heart. If you have heart disease or high blood pressure, follow your doctor’s advice about shoveling snow or performing other hard work in the cold. Otherwise, if you have to do heavy outdoor chores, dress warmly and work slowly. Remember, your body is already working hard just to stay warm, so don’t overdo it.
Understand Wind Chill
The Wind Chill index is the temperature your body feels when the air temperature is combined with the wind speed. It is based on the rate of heat loss from exposed skin caused by the effects of wind and cold. As the speed of the wind increases, it can carry heat away from your body much more quickly, causing skin temperature to drop. When there are high winds, serious weather-related health problems are more likely, even when temperatures are only cool.
Victims of hypothermia are often (1) elderly people with inadequate food, clothing, or heating; (2) babies sleeping in cold bedrooms; (3) people who remain outdoors for long periods—the homeless, hikers, hunters, etc.; and (4) people who drink alcohol or use illicit drugs.
Recognizing Hypothermia
Warnings signs of hypothermia:
What to Do
If you notice any of these signs, take the person’s temperature. If it is below 95°, the situation is an emergency—get medical attention immediately. If medical care is not available, begin warming the
person, as follows:
• Get the victim into a warm room or shelter.
• If the victim has on any wet clothing, remove it.
• Warm the center of the body first—chest, neck, head, and groin—using an electric blanket, if available. Or use skin-to-skin contact under loose, dry layers of blankets, clothing, towels, or sheets.
• Warm beverages can help increase the body temperature, but do not give alcoholic beverages. Do not
try to give beverages to an unconscious person.
• After body temperature has increased, keep the person dry and wrapped in a warm blanket, including the head and neck.
• Get medical attention as soon as possible.
A person with severe hypothermia may be unconscious and may not seem to have a pulse or to be breathing. In this case, handle the victim gently, and get emergency assistance immediately. Even if the victim appears dead, CPR should be provided. CPR should continue while the victim is being warmed, until the victim responds or medical aid becomes available. In some cases, hypothermia victims who appear to be dead can be successfully resuscitated.
Adults:
• shivering, exhaustion
• confusion, fumbling hands
• memory loss, slurred speech
• drowsiness
Infants:
• bright red, cold skin
• very low energy
Frostbite
Frostbite is an injury to the body that is caused by freezing. Frostbite causes a loss of feeling and color in affected areas. It most often affects the nose, ears, cheeks, chin, fingers, or toes. Frostbite can permanently damage the body, and severe cases can lead to amputation. The risk of frostbite is increased in people with reduced blood circulation and among people who are not dressed properly for extremely cold temperatures.
Recognizing Frostbite
At the first signs of redness or pain in any skin area, get out of the cold or protect any exposed skin—frostbite may be beginning. Any of the following signs may indicate frostbite:
• a white or grayish-yellow skin area
• skin that feels unusually firm or waxy
• numbness
A victim is often unaware of frostbite until someone else points it out because the frozen tissues are numb.
What to Do
If you detect symptoms of frostbite, seek medical care. Because frostbite and hypothermia both result from exposure, first determine whether the victim also shows signs of hypothermia, as described previously. Hypothermia is a more serious medical condition and requires emergency medical assistance. If (1) there is fostbite but no sign of hypothermia and (2)immediate medical care is not available, proceed as follows:
• Get into a warm room as soon as possible.
• Unless absolutely necessary, do not walk on frostbitten feet or toes—this increases the damage.
• Immerse the affected area in warm—not hot—water (the temperature should be comfortable to the touch for unaffected parts of the body).
• Or, warm the affected area using body heat.
For example, the heat of an armpit can be used to warm frostbitten fingers.
Do not rub the frostbitten area with snow or massage it at all. This can cause more damage.
• Don’t use a heating pad, heat lamp, or the heat of a stove, fireplace, or radiator for warming. Affected
areas are numb and can be easily burned.
We thank Steve for sharing his knowledge with us. It was a great evening for all that came. THANKS STEVE!! WE APPRECIATE YOU! Thanks to his family also for giving him up for the night.
 STAY WARM!!

Steve shared with us the concept of- smaller spaces get warm easier. Therefore, if we stay in place at home and the energy isn't heating our home, we can create a smaller space for ourselves within our homes to warm easier. If we stay at home we feel a sense of security from being in our enviroment and from being around neighbors that we know and trust. Steve told us that some of the ways to create a smaller place is to place two mattress' together to form a mattress "sandwich" to sleep in between. He also said that if we have plastic sheeting and duct tape we can close off a part of our home and heat it with a Mr. Buddy Heater, which runs off of propane tanks. There are other devices designed to use for heat also. If you look at one of the earlier posts, you can learn to make a heater/cooker out of a paint can.
If we are on the move or out of our home, we can use a tent, box, buildings clothes, food, etc to stay warm. Calorie intake, excercise, the sun, space heaters, fires, handwarmers, insulated spaces can all be used to stay warm. We need to drink water even if we are cold and the water is cold, our bodies need water to stay warm! Eating Carbs will help alot, more than protein. Laying clothing is a good method also. We should avoid cotton as it stays wet a long time. Wool and synthetics are better for the cold weather. Wool gloves will keep us warmer than leather or cotton gloves. Wool blankets are the best to use. Steve showed us a "Bivey sack" which he uses to stay warm while on rescue missions. You can purchase them at REI and other places for about $17+. These can be used by themselves or as an addition to our sleeping bags, blankets, etc.

One way to tell if a person is getting to cold and needs warming is to press on their cheek, the color will go out of that spot. If the color stays out for more than a few seconds the person is starting to get hypothermic. Get them warmed up. If a person is already hypothermic try to warm them from the inside out. If they have frostbite don't thaw them unless they can stay thawed. Frostbite is detected by pale, waxy skin.
Here are some tips on staying warm, dry, comfortable and surviving:
Outside
When the weather is extremely cold, and especially if there are high winds, try to stay indoors. Make any trips outside as brief as possible, and remember these tips to protect your health and safety: If you are away from home, make a shelter to get out of the wind and moisture. Snow caves are what Steve uses. If you don't know about snow caves ask us and we will let you know how to make one. You can use a tent, tarp, pine boughs and many other items to build a shelter.
Dress Warmly and Stay Dry
Adults and children should wear:
• a hat
• a scarf or knit mask to
cover face and mouth
• sleeves that are snug at the wrist
• mittens (they are warmer than gloves)
• water-resistant or water-proof coat and boots
• several layers of loosefitting
clothing
Be sure the outer layer of your clothing is tightly woven, preferably wind resistant, to reduce body-heat loss caused by wind. Wool, silk, or polypropylene inner layers of clothing will hold more body heat than cotton. Stay dry—wet clothing chills the body rapidly. Excess perspiration will increase heat loss, so remove extra layers of clothing whenever you feel too warm. Also, avoid getting gasoline or alcohol on your skin while de-icing and fueling your car or using a snow blower. These materials in contact with the skin greatly increase heat loss from the body. Do not ignore shivering It’s an important first sign that the body is losing
heat. Persistent shivering is a signal to return indoors.
Avoid Exertion
Cold weather puts an extra strain on the heart. If you have heart disease or high blood pressure, follow your doctor’s advice about shoveling snow or performing other hard work in the cold. Otherwise, if you have to do heavy outdoor chores, dress warmly and work slowly. Remember, your body is already working hard just to stay warm, so don’t overdo it.
Understand Wind Chill
The Wind Chill index is the temperature your body feels when the air temperature is combined with the wind speed. It is based on the rate of heat loss from exposed skin caused by the effects of wind and cold. As the speed of the wind increases, it can carry heat away from your body much more quickly, causing skin temperature to drop. When there are high winds, serious weather-related health problems are more likely, even when temperatures are only cool.
Victims of hypothermia are often (1) elderly people with inadequate food, clothing, or heating; (2) babies sleeping in cold bedrooms; (3) people who remain outdoors for long periods—the homeless, hikers, hunters, etc.; and (4) people who drink alcohol or use illicit drugs.
Recognizing Hypothermia
Warnings signs of hypothermia:
What to Do
If you notice any of these signs, take the person’s temperature. If it is below 95°, the situation is an emergency—get medical attention immediately. If medical care is not available, begin warming the
person, as follows:
• Get the victim into a warm room or shelter.
• If the victim has on any wet clothing, remove it.
• Warm the center of the body first—chest, neck, head, and groin—using an electric blanket, if available. Or use skin-to-skin contact under loose, dry layers of blankets, clothing, towels, or sheets.
• Warm beverages can help increase the body temperature, but do not give alcoholic beverages. Do not
try to give beverages to an unconscious person.
• After body temperature has increased, keep the person dry and wrapped in a warm blanket, including the head and neck.
• Get medical attention as soon as possible.
A person with severe hypothermia may be unconscious and may not seem to have a pulse or to be breathing. In this case, handle the victim gently, and get emergency assistance immediately. Even if the victim appears dead, CPR should be provided. CPR should continue while the victim is being warmed, until the victim responds or medical aid becomes available. In some cases, hypothermia victims who appear to be dead can be successfully resuscitated.
Adults:
• shivering, exhaustion
• confusion, fumbling hands
• memory loss, slurred speech
• drowsiness
Infants:
• bright red, cold skin
• very low energy
Frostbite
Frostbite is an injury to the body that is caused by freezing. Frostbite causes a loss of feeling and color in affected areas. It most often affects the nose, ears, cheeks, chin, fingers, or toes. Frostbite can permanently damage the body, and severe cases can lead to amputation. The risk of frostbite is increased in people with reduced blood circulation and among people who are not dressed properly for extremely cold temperatures.
Recognizing Frostbite
At the first signs of redness or pain in any skin area, get out of the cold or protect any exposed skin—frostbite may be beginning. Any of the following signs may indicate frostbite:
• a white or grayish-yellow skin area
• skin that feels unusually firm or waxy
• numbness
A victim is often unaware of frostbite until someone else points it out because the frozen tissues are numb.
What to Do
If you detect symptoms of frostbite, seek medical care. Because frostbite and hypothermia both result from exposure, first determine whether the victim also shows signs of hypothermia, as described previously. Hypothermia is a more serious medical condition and requires emergency medical assistance. If (1) there is fostbite but no sign of hypothermia and (2)immediate medical care is not available, proceed as follows:
• Get into a warm room as soon as possible.
• Unless absolutely necessary, do not walk on frostbitten feet or toes—this increases the damage.
• Immerse the affected area in warm—not hot—water (the temperature should be comfortable to the touch for unaffected parts of the body).
• Or, warm the affected area using body heat.
For example, the heat of an armpit can be used to warm frostbitten fingers.
Do not rub the frostbitten area with snow or massage it at all. This can cause more damage.
• Don’t use a heating pad, heat lamp, or the heat of a stove, fireplace, or radiator for warming. Affected
areas are numb and can be easily burned.
We thank Steve for sharing his knowledge with us. It was a great evening for all that came. THANKS STEVE!! WE APPRECIATE YOU! Thanks to his family also for giving him up for the night.

Friday, February 19, 2010
Solar Still.......
The Solar Still

I was not getting any cooperation from the weather getting this week's forum together. I made a Solar Still, actually two different types, and put them outside to produce clean, clear water. Well, the sun did not come out for long and the still didn't produce the way I had hoped it would. I will try again on a sunny day. We did have a great turn out of people and much participation in the forum this week. It was Great!!! Thanks to all that attended, especially the newcomers from the 6th and 9th wards. We even had a visitor from Layton!!! Everyone is welcome to come.
The solar still works on the principal of condensation, which is pure water, dripping into a container. The water that comes from the condensation is distilled water and pure to drink. So use your imagination to make what ever type of still you can imgine with the materials you have. I used a dark colored cleaned out root beer bottle. It was dark in color so it heated the water inside faster to make the condensation faster. I attached a tube to that bottle and ran the tube into another bottle placed at a lower level so the condensaton would run into it. It was easy! The other one was a large bowl with dirty water inside. Another smaller bowl was placed in the middle of the large bowl. Plastic was placed over the top tightly to allow the condensation to form. In the middle of the bowl above the smaller bowl, I placed a rock to create a lower spot on the plastic so that the condensation would run to the low spot and drip into the smaller bowl. It worked but I didn't get as much pure water as I hoped, because of the lack of sun. So use your imgination to create a still and let us know what you did and how it worked.
Here are some instructions for a serious solar still. See the picture above.
Solar Water Distiller

---------------------------------------------------------------------------
Solar Stills operate on the same principles that produce rainfall. The sun is allowed into and trapped in the Still. The high temperatures produced destroy all pathogens. The water evaporates, and in this process, only pure water vapor rises in the Still, only to condense on the glass. The glass is sloped to the south, and the condensed water runs down the glass and is collected in a trough. The water is allowed out of the collector through silicone tubing, and is collected in 5 gallon glass jugs. There are no moving parts in the solar still, and only the sun's energy is required for operation.
The design of the our Solar Still began with many hours spent researching previous designs, successes and failures. Our goal for the Still project was to design and develop plans for a Still which could be replicated using "off the shelf" materials.

We designed a still which is easy to replicate, using standard building materials, of which 95% are available "off the shelf". The exterior materials were chosen for their ability to withstand our desert climate with minimal maintenance. The still produces an average of 3 gallons per day in the summer months. Winter production is expected to be 1/2 that amount. The Solar Still can utilize a standard size patio glass replacement, 34"X76".
Brackish water is carefully placed inside Solar Still via an inlet near the base of the Still. As sunlight warms the black silicone bottom and heat is transferred to the water, the top of the water evaporates on to the inside of the glass cover, which is tilted toward the fresh water drain. approximately 8 square feet (of glass cover) will distill around 1 gallon of water per day, over five hours of full sunlight.
The most important elements of the design are the sealing of the base with black, high temperature silicone rubber; (spread it on with a Bondo squeegee) and creating a good seal between the glass cover and the bottom of the box.
--------------------------------------------------------------------------------
The Solar Basin Still

The Still is filled each morning or evening, and the day's production is collected at that time. The Still will continue to produce after sundown as the water is still very hot. The Still is over filled each day to flush out sediment. The over flow water can be used for irrigation. The only maintenance is to clean the glass occasionally.
A Large Solar Distiller Array!

Many stills put together and dripping into a large container of fresh, pure water!
Emergency Survival Tool
Fortunately, there is an emergency survival technique for gathering water from our driest deserts during their most brutal seasons. It is commonly known as the Solar Still. One of the most significant survival tools created in the last 40 years. the Solar Still was developed by two physicians working for the U.S. Department of Agriculture. Results of extensive testing in the Arizona deserts by the U.S. Air Force proved that when properly assembled, the still can save your life.
The Solar Still functions under the general principle of the "greenhouse effect". Solar energy heats the ground by passing through a clear plastic barrier. Moisture from the soil then evaporates, rises and condenses on the underside of the plastic barrier above.
The still also has the ability to purify tainted water. In fact, it condenses pure water from just about anything. Even urine will produce clean, drinkable water. (CAUTION: One fluid never to be used is radiator fluid, as its toxins will vaporize and poison the water.)
Materials
There are only 2 essential components to constructing the Solar Still -- a container to catch the water and a 6 x 6-footsheet of clear plastic. A shovel or trowel, a length of plastic tube and tape are all optional.
The container can be a collapsible cup, an empty plastic bottle, a small cooking pot or just about anything with a large enough opening to catch falling drops of water. In a pinch, even tin foil or a sandwich bag can be fashioned into a workable receptacle.
The sheet of clear plastic can be a ground cloth used under tents when backpacking or a thin painting drop cloth. Both work well as long as there are no tears or holes. This is the one item that should be carried at all times, since there is no natural substitute out in the boonies. I keep a 6 x 12-foot plastic drop cloth taped inside my daypack, large enough to make 2 stills if necessary. Some desert rats like to keep their plastic sheets folded inside a hip sack or as part of their first-aid kits.
A 6-foot length of flexible plastic tubing, similar to the kind used in fish tanks is a non-essential but desirable addition to the still components. This will allow you to drink accumulated water without needing to break down the solar still, inevitably affecting its efficiency.
Construction
The best part of this life-saving device is that for something that collects water from seemingly nothing, the solar still is amazingly simple to build. Here's how:
1. Dig a pit approximately 4 feet wide and 3 feet deep. Use a shovel, hand trowel, a digging stick or even your hands in soft soil or sand. Look for a sandy wash or a depression where rainwater might collect.
2. . In the center of the pit, dig another small hole deep enough for the water container.
3. Place the container inside, then run the tubing from the container to the outside of the pit. If there is tape available, tape the tubing to the inside of the container.
4. Blanket the pit with the plastic sheet, evenly on all sides, but not touching the bottom of the pit. Anchor the corners with rocks.
5. Find a small rounded rock to place in the center of the sheet, over the water container. This will keep the plastic centered and control any flapping from the wind. Gently push down on the center weight until the sides slope to a 45º angle. If the pit is dug deep enough, this should leave the center weight just a few inches above the water container.
6. Next, secure the edges of the plastic sheet with rocks and dirt. Make sure there are no places where moisture can escape.
7. Close the tubing end with a knot, or double it and tie it closed.
Within 2 hours, the air inside the still will become saturated with moisture and begin to condense onto the underside of the plastic sheeting. Because of the angle of the plastic, water will run down towards the center. Finally, drops will gather and fall from the apex down into the water container. As the container fills, simply sip fresh, sterile water from the plastic tubing. In especially dry conditions, water output can be increased by placing succulent plant material inside the still.
The Solar Still only takes about an hour to build. If constructed correctly, it can yield about a quart of water a day. And although the palm trees may be noticeably absent, you will have made your very own oasis in the desert, quicker than Hollywood could.
Wednesday, February 17, 2010
Food Storage Spaces can be found ANYWHERE in your home, not just in the basement and no one will even know it's there.
I have had many ask-Where do I put my food storage? Well, here is a few ideas that I hope help out with that question. As you look at the suggestions, think of places in your home that can be used. It may be time to clean out some clutter to make room for your storage. You could even have a garage sale to make some money for your storage. Remember, in doing this we are being obedient so keep your priorities in mind. What I mean by that is this: I had one person tell me that they "can't store water because there is no place to put it that it will look good." I believe that when the time comes that they need that water they will realize the statement, and action that they took and the sillyness of it. By then it will be to late to store what they needed. How sad that will be! Reality will strike!
Let's get back to the places to store things.....here are some suggestions.
Under the bed. You can store a years worth of basics for one person under a twin bed.

In the pantry.

In a hall closet.

In a bedroom closet.

In the garage. Although the heat and cold in a garage is not the best conditions for food. If rotated it will be good. It is better to have food then to not have it.


Try the bathroom closet. Notice the stripes of wood to hold the items back.
 Bins can be placed where ever there is a small spot.

Plastic shelves can be made tall and short to fit where your need them.

 Check for space under the stairs.


Walk through your home and take a look around.
Did you find any empty shelves,closets or other places? What about those cluttered shelves we talked about? Is it time to make better use of them?
Your CHALLENGE TODAY is to walk around your house and take notes. List spaces that will work for you and MAKE A PLAN, SET A GOAL AND DO IT!!
I have had many ask-Where do I put my food storage? Well, here is a few ideas that I hope help out with that question. As you look at the suggestions, think of places in your home that can be used. It may be time to clean out some clutter to make room for your storage. You could even have a garage sale to make some money for your storage. Remember, in doing this we are being obedient so keep your priorities in mind. What I mean by that is this: I had one person tell me that they "can't store water because there is no place to put it that it will look good." I believe that when the time comes that they need that water they will realize the statement, and action that they took and the sillyness of it. By then it will be to late to store what they needed. How sad that will be! Reality will strike!
Let's get back to the places to store things.....here are some suggestions.
Under the bed. You can store a years worth of basics for one person under a twin bed.

In the pantry.

In a hall closet.

In a bedroom closet.

In the garage. Although the heat and cold in a garage is not the best conditions for food. If rotated it will be good. It is better to have food then to not have it.

Barrels could be another choice.


Look for places that will work in your home.

Try the bathroom closet. Notice the stripes of wood to hold the items back.


Plastic shelves can be made tall and short to fit where your need them.

Some pieces of wood on a concrete wall make a place to hang items.


Boxes of #10 cans can be placed against a wall.

Walk through your home and take a look around.
Did you find any empty shelves,closets or other places? What about those cluttered shelves we talked about? Is it time to make better use of them?
Your CHALLENGE TODAY is to walk around your house and take notes. List spaces that will work for you and MAKE A PLAN, SET A GOAL AND DO IT!!
Friday, February 12, 2010
Water Storage & Water Filtration

You go to the water facet in your home, turn the knob and the water comes out brown & stinky or worse yet....no water at all comes out!! What do you do? After the initial shock, we can think of the stored water we have in the garage, basement or other place you have decided to keep your water! If this were to happen today....are you ready? I hope the answer is YES. Just in case the answer is negative, let's go over how to store water.
Amount of Emergency Water to Store
Whereas a quart of water or other fluid daily will sustain life, according to the Department of Defense and the Office of Civil Defense, it is recommended that a gallon of water per day per person be stored for food preparation and drinking. A gallon provides added comfort and accommodates increased fluid needs at higher altitudes or warm climates. An additional one-half to 1 gallon per day is recommended for bathing and hygiene, and to wash dishes.
 You can never have to much water!
How much water should I store? The rule of thumb is to store at least one gallon per person per day for at least 3 days (for earthquake preparedness). That’s 2 quarts for drinking and 2 quarts for food preparation and sanitation. A family of four should store a minimum of 12 gallons of water. Personally, I recommend storing as much as possible. Also, if you store dry foods you will need water to hydrate them. Use the following guidelines when storing water:
1. Store drinking water in carefully cleaned, non-corrosive, tightly covered containers.
2. Store containers in a cool dark place. DO NOT store in direct sunlight. Polyethylene plastics (prepackaged milk and water bottles) are somewhat permeable to hydrocarbon vapors. Keep away from stored gasoline, kerosene, pesticides, or similar substances.
3. Stored tap water should be rotated every 6 months. Prepackaged bottled water should be rotated once a year. Check the pull date on the container. Be sure it didn’t sit on the store’s shelf for a year before you purchased it. Self Serve Bottled Water should be rotated once a year, as long as the water treatment process includes ozonation.
4. Rotate your stored water with the water you use on a regular basis. This practice helps insure you don’t have water stored longer than one year.
Containers That Can be Used for Water Storage
Food-grade plastic or glass containers are suitable for storing water. One-, three- and five-gallon water containers can be purchased from most outdoor or hardware stores. Any plastic or glass container that previously held food or beverages such as 2-liter soda bottles or water, juice, punch or milk jugs, also may be used. Stainless steel can be used to store water which has not been or will not be treated with chlorine; chlorine is corrosive to most metals.
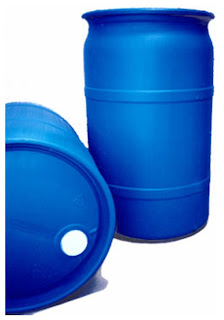
55 gal drums, designed specifically for water storage can be difficult to transport, if the need arises, but are of a tremendous value in an emergency .When looking for additional food grade containers, the bottom will be stamped with HDPE (High Density PolyEthylene) and coded with the recycle symbol and a “2″ inside. HDPE containers are FDA-approved for food. Containers without these designations aren’t OK because of possible chemical interactions between the water and the plastic.
Clean used containers and lids with hot soapy water. Once the containers have been thoroughly cleaned, rinse them with water and sanitize the containers and lids by rinsing them with a solution of 1 tablespoon chlorine bleach per gallon of water. Leave the containers wet for two minutes, then rinse them again with water. Remember to remove the paper or plastic lid liners before washing the lids. It is very difficult to effectively remove all residue from many containers, so carefully clean hard-to-reach places like the handles of milk jugs. To sanitize stainless steel containers, place the container in boiling water for 10 minutes. Never use containers that previously held chemicals.
A variety of containers is a good thing. If you have to leave your home a 55 gal drum would be hard to carry, so you'll want some water in containers that you can carry. If you stay in your home you'll want the volume of water that the drums provide.
Do I Need to Treat Water?
Once you properly clean containers, fill them with potable, or safe, drinking water. All public water supplies are already treated and should be free of harmful bacteria. However, as an additional precaution, it is recommended that you add 5-7 drops, about 1/8 teaspoon, of chlorine bleach per gallon of water stored. This precaution protects you against any lingering organisms in storage containers that may have been inadvertently missed during the cleaning process.
Where to Store Water
Clearly label all water containers “drinking water” with the current date. Store the water in a cool, dry place away from direct sunlight and heat sources. Do not store it near gasoline, kerosene, pesticides or similar substances.
When potable water is properly stored, it should have an indefinite shelf life; however, it’s a good idea to use and replace the stored water every 6 – 12 months. Rotating water this way provides you with an opportunity to experiment and check the amount of stored water against what you require. It also serves as an additional precaution against bacteria or viruses growing in containers which may not have been thoroughly or properly cleaned and sanitized.
If you have freezer space, storing some water in the freezer is a good idea. If you lose electricity, the frozen water will help keep foods in your freezer frozen until the power is restored. Make sure you leave 2 to 3 inches of space in containers because water expands as it freezes.
Emergency Sources of Water
In an emergency, if you have not previously stored water and commercial or public sources of water are not available, drain water from your plumbing system. Unless you are advised that the public water supply has been contaminated and is not safe, open the drain valve at the bottom of the water heater and salvage the water stored in the heater. A typical water heater holds 30-60 gallons of water. Discard the first few gallons if they contain rust or sediment. Let the water heater cool before draining it from the heater so it does not scald you. Turn off the electricity or gas to the water heater to prevent the heater from operating without water. Once water has been drained into clean, sanitized containers, add 5-7 drops of chlorine bleach* per gallon of water, and stir or shake the solution to mix it. Let it set 30 minutes before use.
Emergency Outdoor Water Sources
If you need to find water outside your home, you can use these sources. Be sure to treat the water first. Additional sources include:
Rainwater Streams, rivers and other moving bodies of water Ponds and lakes Natural springs Avoid water with floating material, an odor or dark color. Use saltwater only if you distill it first. You should not drink flood water.
Hidden Water Sources in Your Home
If a disaster catches you without a stored supply of clean water, you can use the water in your hot-water tank, pipes and ice cubes. As a last resort, you can use water in the reservoir tank of your toilet (not the bowl).
Do you know the location of your incoming water valve? You’ll need to shut it off to stop contaminated water from entering your home if you hear reports of broken water or sewage lines.
To use the water in your pipes, let air into the plumbing by turning on the faucet in your house at the highest level. A small amount of water will trickle out. Then obtain water from the lowest faucet in the house.
To use the water in your hot-water tank, be sure the electricity or gas is off, and open the drain at the bottom of the tank. Start the water flowing by turning off the water intake valve and turning on a hot-water faucet. Do not turn on the gas or electricity when the tank is empty.
Using Swimming Pool Water
You should always view your pool as “backup” water; keep the water treated; you never know when it will be needed! The maintenance of the free chlorine residual will prevent establishment of any microorganisms. The maintenance level should be kept about 3-5ppm free chlorine. (See Water Purification for detailed information on purifying pool water.) If other stored water stocks are not available, remove the necessary pool water and boil it or just treat with chlorine to the normal 5ppm. It is best to err on the side of caution.
Covering the pool at all times when not in use is a very good idea. Try to keep the cover clean and wash the area you put it on when removing it from the pool. You decide if you want to use this source, some people don't recommend it. I don't think it is any worse and maybe even better than getting water from a lake, strean etc.
When and How to Treat Water for Storage
In an emergency, if you do not have water that you know is safe, it’s possible to purify water for drinking. Start with the cleanest water you can find and treat with one of the following methods:
· Boiling and chlorinating: Water can be purified by boiling. Boiling times may vary from state to state, depending on altitude. In Colorado, the water is safe to use once after it has been boiled for three to five minutes and has cooled. If you plan to store boiled water, pour it into clean, sanitized containers and let it cool to room temperature. Then add 5-7 drops, or 1/8 teaspoon, of chlorine bleach* per gallon of water (1/2 teaspoon per 5 gallons). Stir or shake the solution to mix it. Cap the containers and store them in a cool, dry place.
· Filtering and chlorinating: You can filter water if you have a commercial or backpack filter that filters to 1 micron. These are available in sporting good stores and are recommended for use when back-packing. They are not recommended to clean large volumes of water. Filtering eliminates parasites such as giardia and cryptosporidium, but it may not eliminate all bacteria and viruses. Therefore, it’s recommended that 5-7 drops (1/8 teaspoon) of chlorine bleach* be added per gallon of filtered water (1/2 teaspoon for 5 gallons). Stir or shake the solution to mix it. Wait 30 minutes before using the water, or cap the containers and store them in a cool, dry place.
*Use liquid household bleach that contains 5.25 percent hypochlorite. Do not use bleaches with fresheners or scents as they may not be safe to consume. The above treatment methods use a two-step approach so less bleach is needed, yet giardia and cryptosporidium are destroyed through boiling or eliminated by filtering. Chlorine may not be effective against these parasites. Since adding too much chlorine to water can be harmful, it’s important to be as accurate as possible when measuring. You can also get dry bleach from a pool supply. It goes a long way and is safer to use.
· Distillation Distillating involves boiling water and then collecting the vapor that condenses back to water. The condensed vapor will not include salt and other impurities. To distill, fill a pot halfway with water. Tie a cup to the handle on the pot’s lid so that the cup will hang right-side-up when the lid is upside-down (make sure the cup is not dangling into the water) and boil the water for 20 minutes. The water that drips from the lid into the cup is distilled.
Most water filtration devices are designed for use on microbiologically safe water. Don’t assume they are safe to use on contaminated water. Check with the manufacturer to be sure.
Use the following guidelines to determine if filtration equipment is adequate to use with microbiologically contaminated water:
Filtration Equipment Safe on Microbiologically Contaminated Water?
Carbon Filter- No
Reverse Osmosis- No
Deionization Filter- No
Pitcher Filter- No
Faucet Mount Filter- No
Steam Distiller Yes – but requires electricity
UV Sterilizer Yes – but requires electricity
Ceramic Filter Some – YES but only if rated for bacteriological protection
Equipment that is safe to use on contaminated water is often slow, costly, inconvenient and/or high maintenance. It makes the most sense to use the filtration equipment that best meets your normal daily needs and shift to water storage or alternative methods of water treatment in times of emergencies.
Purifying Water
· If water is polluted, strain through paper towels, paper coffee filters, or several layers of clean cloth into a container to remove any sediment or flaking material. Then boil the water vigorously for 10 minutes, as this will usually make it safe to drink. Add one additional minute for each 10,000 feet of altitude, depending on the area you live in. Jane has "water socks" for $10 each that will strain the debris out of water so that you can purify it without the chunks in it. Call her to get some. She gets these from a special source.
· Another method of purification is to strain the water as described above, and then to chemically purify it by adding liquid bleach or tincture of iodine.
· For clear water, use two drops of bleach or three drops of tincture of iodine per liter. If the water is cloudy, then these amounts should be doubled. Store an eye dropper with your emergency supplies, to be used only for this purpose.
· Mix thoroughly by stirring or shaking water in a container. Let the water stand for 30 minutes. A slight chlorine odor should be detectable. If not then the dosage should be repeated and the water allowed to stand for an additional 15 minutes.
· Liquid bleach loses strength over time. For this reason I mark each bleach container with the current date. If the bleach is one-year-old, double the amount. Two-year-old bleach should not be used.
· Water purification tablets will purify one liter of water. The tablets have a shelf life of two years and lose their effectiveness if them get damp.
· Purify enough water to last a maximum of 48 hours. Water allowed to sit for longer than this may become re-contaminated.
Prepare Containers
Thoroughly clean the bottles with dishwashing soap and water, and rinse completely so there is no residual soap.
Additionally, for plastic soft drink bottles, sanitize the
bottles by adding a solution of 1 teaspoon of non-scented liquid household chlorine bleach to a quart (1/4 gallon) of water. Swish the sanitizing solution in the bottle so that it touches all surfaces. After sanitizing the bottle, thoroughly rinse out the sanitizing solution with clean water.
Fill the container
Fill the bottle to the top with regular tap water. (If your water utility company treats your tap water with chlorine, you do not need to add anything else to the water to keep it clean.) If the water you are using comes from a well or water source that is not treated with chlorine, add two drops of non-scented liquid household chlorine bleach to each gallon of water.
Tightly close the container using the original cap. Becareful not to contaminate the cap by touching the inside of it with your fingers. Write the date on the outside of the container so that you know when you filled it. Store in a cool, dark place. One more important note: get a new hose to fill your water drums old ones have fungus and bacteria in them. We don't want this in water to be stored.
WAYS TO TREAT WATER
The instructions below are for treating water of uncertain quality in rare emergency situations in the absence of instructions from local authorities when no other reliable clean water source is available and you have used all of your stored water. If you store enough water in advance, you will not need to treat water using these or other methods.
Boiling is the safest method of treating water. In a large pot or kettle, bring water to a rolling boil for 5 full minutes, keeping in mind that some water will evaporate. Cover if you can. Let the water cool before drinking. Boiled water will taste better if you put oxygen back into it by pouring the water back and forth between two clean containers. This will also improve the taste of stored water. You will need alot of fuel for this method.
You can use household liquid bleach to kill microorganisms. Use only regular household liquid bleach that contains 5.25 to 6.0 percent sodium hypochlorite. Do not use scented bleaches, colorsafe bleaches, or bleaches with added cleaners. Because the potency of bleach diminishes with time, use bleach from a newly opened or unopened bottle. Add 16 drops (1/8 teaspoon) of bleach per gallon of water, stir and let stand for 30 minutes. The water should have a slight bleach odor. If it doesn’t, then repeat the dosage and let stand another 15 minutes. If it still does not smell of bleach, discard it and find another source of water.
Other chemicals, such as iodine or water treatment products (sold in camping or surplus stores) that do not contain 5.25 to 6.0 percent sodium hypochlorite as the only active ingredient, are not recommended and should not be used.
Distillation
While the two methods described above will kill most microorganisms in water, distillation will remove microorganisms that resist these methods, as well as heavy metals, salts, and most other chemicals.
Distillation involves boiling water and then collecting the vapor that condenses back to water. The condensed vapor will not include salt or most other impurities. To distill, fill a pot halfway with water. Tie a cup to the handle on the pot’s lid so that the cup will hang right-side-up when the lid is upside-down (make sure the cup is not dangling into the water), and boil the water for 20 minutes. The water that drips from the lid into the cup is distilled.
*****************
Homemade Water Filters
The key to making a homemade water filter is to having the right materials readily available. A homemade water filter can be made easily and inexpensively and can serve your immediate clean water needs.
Types of Homemade Water Filters
There are two schools of thought about homemade water filters when it comes to construction. The first is to create one with prefabricated parts accessible from online distributors. The other school of thought is to create your own components from everyday household items. In either case, the parts needed to make your own water filter are relatively easy to assemble.
A housing configuration will be needed to house the filtration system. Single, double, or triple filtration housing systems are available, a decision should be made on which would serve immediate filtration needs. Each housing configuration should include housing, stand, spout, diverter and all of the fittings.
Once the housing configuration has been chosen, the filters to be housed should be next. There are a few options in filters for homemade water filters. Activated_carbon is the most common type of filter. Charcoal particles tightly packed together create a network to catch unwanted particles such as lead and other contaminates.
Silver sterasyl ceramic is another type of filter. The compounds in this particular filter act upon more harmful bacteria and cysts such as giardia. However, due to their use of a proprietary silver impregnated ceramic for their microfilters, this type would be beyond the scope of most people looking to make homemade water filters.
Carbon block filters are the other of the basic type of water filtration systems. These types of filters contain powdered or solid carbon blocks. When water is forced through the carbon, it filters out all of the unwanted and harmful particulates and contaminates in water as well as unwanted chlorine and fluoride that can be added to municipal water supplies. Typically, carbon block filters boast a higher contaminant removal ratio.
Once the filter type has been chosen, simply slip the filter cylinder in the housing configuration, secure the housing to the countertop and hook the water lines to the plumbing. Once connected water should be allowed to flow freely through the filter line for five to ten minutes for clearance and proper filter activation.
Portable Water Filters
One other type of homemade water filter is far more portable and personal. The materials for this style of water filter are readily available and can be found easily in most households.
A two-liter plastic water bottle with the lid will serve as the housing for the filtration system. An ordinary plastic straw will serve as the spout. The filtration system will consist of cotton batting, fine and large grain gravel, fine and large grain sand, and a coffee filter. Activated charcoal granules may be added for an extra level of filtration. The filtered water can be captured in a mug or jar.
To create this style of homemade water filter, cut off the bottom of the two-liter water bottle. Create a hole in the lid of the bottle so that a straw may fit snugly. The straw must sit half way through the opening in the lid. This housing configuration will sit on the jar or mug with the straw end of the housing inside the jar.
Place the cotton batting at the bottom of the two-liter bottle, this will serve as the lining for your filtration system. Start with a layer of activated charcoal granules.
Next, place a layer of fine grain sand followed by a layer of large grain sand. Follow the layers of sand with a layer of fine grain gravel then larger grain gravel.
Alternate these layers until you reach the top of the bottle.
Top the filtration system with the coffee filter. Once the filtration system is in place, pour in the unfiltered water through the coffee filter. The untreated water will work through the layers of sediment to wick away the impurities in the water. The cotton batting catches particulates from the sediment and acts as a final buffer. The filtered water will flow through the straw spout into the jar for drinking. Adding a couple of drops of chlorine can add another level of filtration to the process.
***********************
WATER FILTER INSTRUCTIONS
In areas subject to fallout, about 99% of the radioactivity in water could be removed BY filtering the water through at least 8 inches of soil taken from 8 inches "Below" the surface. That soil has not been leached of the "clay" particles in the soil "needed to attract the radioactivity" in the water. SANDY soil will not work as a filter because it lacks the necessary soil "clay". Most homes and flowerbeds have enough clay in the soil to work as a filter. Kids play clay does NOT work at all. It has to be soil clay
Get yourself a 5-gallon can, trashcan, bucket, wastebasket, washtub, container. With a hammer and a nail not as big as pencil, punch about a dozen holes in the bottom of the can, punch the holes from the bottom up into the can. Make the holes near the center, in a ring, or circle. Wad up some coat hangers, about a dozen. Put a couple of washcloths in the bucket bottom and the coat hangers on top of them. OR you can just use a bunch of silverware, enough for 6 or 8 people. Knives, forks, spoons. You are creating a void space. Then a bath towel with the ends hanging out over the sides of the bucket.
Put a couple of shovel full's of dirt in the bucket, spread it out even, then some more until it is 8 inches deep in the bucket. Fold-over the towel ends into the bucket, and smooth out the wrinkles as best as you can. Then put a couple more washcloths on top of the waded towel. Pour the contaminated water in slowly and let it soak down through your filter creation. Put your marvelous water filter in another larger can or bucket, standing on some glasses or a couple of food cans or bricks to hold it up. Every 10 Gallons of dirty, OR CLEAN, contaminated water you need to change the soil. WHY? Answer is "BECAUSE" the "clay" in the soil has absorbed the radiation in the water and the clay can't absorb any more. Just like a sponge when it's full, can't hold any more water. "Clay" can only hold so much fallout gamma rays. You take the soil from down below the fallout out in the yard, at least 8 inches deep and you will have enough soil to filter a lot of water, to keep you alive.
If you do not get the radiation "OUT" of water, you are killing your insides and your brain won't know it for two weeks. You are dead.
Then you have to kill the germs in the filtered water, BEFORE you drink it. What is best is to prepare.
******************
There are many commercial water filters available for your home and also portable ones. Look them over before you buy.
ASAP silver solution -one bottle will clean 6.5 gals on water.
Xpack water filter -see online-- made for the military to use. Comments are they are very good. they are light to carry and will give a 10 day water supply. They sell for about $63. Available at Costco also.
I hope this helps answer the WATER questions. As always leave your questions (just click on comments below each post) on this blog or call and we'll get you an answer!!
NEXT WEEK: HOW TO MAKE A SOLAR STILL this is another great way to clean and gather water. Come See!


When empty don't rinse. Fill with water for hand washing, cleaning, etc.
*************************************************************You go to the water facet in your home, turn the knob and the water comes out brown & stinky or worse yet....no water at all comes out!! What do you do? After the initial shock, we can think of the stored water we have in the garage, basement or other place you have decided to keep your water! If this were to happen today....are you ready? I hope the answer is YES. Just in case the answer is negative, let's go over how to store water.
Amount of Emergency Water to Store
Whereas a quart of water or other fluid daily will sustain life, according to the Department of Defense and the Office of Civil Defense, it is recommended that a gallon of water per day per person be stored for food preparation and drinking. A gallon provides added comfort and accommodates increased fluid needs at higher altitudes or warm climates. An additional one-half to 1 gallon per day is recommended for bathing and hygiene, and to wash dishes.

How much water should I store? The rule of thumb is to store at least one gallon per person per day for at least 3 days (for earthquake preparedness). That’s 2 quarts for drinking and 2 quarts for food preparation and sanitation. A family of four should store a minimum of 12 gallons of water. Personally, I recommend storing as much as possible. Also, if you store dry foods you will need water to hydrate them. Use the following guidelines when storing water:
1. Store drinking water in carefully cleaned, non-corrosive, tightly covered containers.
2. Store containers in a cool dark place. DO NOT store in direct sunlight. Polyethylene plastics (prepackaged milk and water bottles) are somewhat permeable to hydrocarbon vapors. Keep away from stored gasoline, kerosene, pesticides, or similar substances.
3. Stored tap water should be rotated every 6 months. Prepackaged bottled water should be rotated once a year. Check the pull date on the container. Be sure it didn’t sit on the store’s shelf for a year before you purchased it. Self Serve Bottled Water should be rotated once a year, as long as the water treatment process includes ozonation.
4. Rotate your stored water with the water you use on a regular basis. This practice helps insure you don’t have water stored longer than one year.
Containers That Can be Used for Water Storage
Food-grade plastic or glass containers are suitable for storing water. One-, three- and five-gallon water containers can be purchased from most outdoor or hardware stores. Any plastic or glass container that previously held food or beverages such as 2-liter soda bottles or water, juice, punch or milk jugs, also may be used. Stainless steel can be used to store water which has not been or will not be treated with chlorine; chlorine is corrosive to most metals.
55 gal drums, designed specifically for water storage can be difficult to transport, if the need arises, but are of a tremendous value in an emergency .When looking for additional food grade containers, the bottom will be stamped with HDPE (High Density PolyEthylene) and coded with the recycle symbol and a “2″ inside. HDPE containers are FDA-approved for food. Containers without these designations aren’t OK because of possible chemical interactions between the water and the plastic.
Clean used containers and lids with hot soapy water. Once the containers have been thoroughly cleaned, rinse them with water and sanitize the containers and lids by rinsing them with a solution of 1 tablespoon chlorine bleach per gallon of water. Leave the containers wet for two minutes, then rinse them again with water. Remember to remove the paper or plastic lid liners before washing the lids. It is very difficult to effectively remove all residue from many containers, so carefully clean hard-to-reach places like the handles of milk jugs. To sanitize stainless steel containers, place the container in boiling water for 10 minutes. Never use containers that previously held chemicals.
A variety of containers is a good thing. If you have to leave your home a 55 gal drum would be hard to carry, so you'll want some water in containers that you can carry. If you stay in your home you'll want the volume of water that the drums provide.
Do I Need to Treat Water?
Once you properly clean containers, fill them with potable, or safe, drinking water. All public water supplies are already treated and should be free of harmful bacteria. However, as an additional precaution, it is recommended that you add 5-7 drops, about 1/8 teaspoon, of chlorine bleach per gallon of water stored. This precaution protects you against any lingering organisms in storage containers that may have been inadvertently missed during the cleaning process.
Where to Store Water
Clearly label all water containers “drinking water” with the current date. Store the water in a cool, dry place away from direct sunlight and heat sources. Do not store it near gasoline, kerosene, pesticides or similar substances.
When potable water is properly stored, it should have an indefinite shelf life; however, it’s a good idea to use and replace the stored water every 6 – 12 months. Rotating water this way provides you with an opportunity to experiment and check the amount of stored water against what you require. It also serves as an additional precaution against bacteria or viruses growing in containers which may not have been thoroughly or properly cleaned and sanitized.
If you have freezer space, storing some water in the freezer is a good idea. If you lose electricity, the frozen water will help keep foods in your freezer frozen until the power is restored. Make sure you leave 2 to 3 inches of space in containers because water expands as it freezes.
Emergency Sources of Water
In an emergency, if you have not previously stored water and commercial or public sources of water are not available, drain water from your plumbing system. Unless you are advised that the public water supply has been contaminated and is not safe, open the drain valve at the bottom of the water heater and salvage the water stored in the heater. A typical water heater holds 30-60 gallons of water. Discard the first few gallons if they contain rust or sediment. Let the water heater cool before draining it from the heater so it does not scald you. Turn off the electricity or gas to the water heater to prevent the heater from operating without water. Once water has been drained into clean, sanitized containers, add 5-7 drops of chlorine bleach* per gallon of water, and stir or shake the solution to mix it. Let it set 30 minutes before use.
Emergency Outdoor Water Sources
If you need to find water outside your home, you can use these sources. Be sure to treat the water first. Additional sources include:
Rainwater Streams, rivers and other moving bodies of water Ponds and lakes Natural springs Avoid water with floating material, an odor or dark color. Use saltwater only if you distill it first. You should not drink flood water.
Hidden Water Sources in Your Home
If a disaster catches you without a stored supply of clean water, you can use the water in your hot-water tank, pipes and ice cubes. As a last resort, you can use water in the reservoir tank of your toilet (not the bowl).
Do you know the location of your incoming water valve? You’ll need to shut it off to stop contaminated water from entering your home if you hear reports of broken water or sewage lines.
To use the water in your pipes, let air into the plumbing by turning on the faucet in your house at the highest level. A small amount of water will trickle out. Then obtain water from the lowest faucet in the house.
To use the water in your hot-water tank, be sure the electricity or gas is off, and open the drain at the bottom of the tank. Start the water flowing by turning off the water intake valve and turning on a hot-water faucet. Do not turn on the gas or electricity when the tank is empty.
Using Swimming Pool Water
You should always view your pool as “backup” water; keep the water treated; you never know when it will be needed! The maintenance of the free chlorine residual will prevent establishment of any microorganisms. The maintenance level should be kept about 3-5ppm free chlorine. (See Water Purification for detailed information on purifying pool water.) If other stored water stocks are not available, remove the necessary pool water and boil it or just treat with chlorine to the normal 5ppm. It is best to err on the side of caution.
Covering the pool at all times when not in use is a very good idea. Try to keep the cover clean and wash the area you put it on when removing it from the pool. You decide if you want to use this source, some people don't recommend it. I don't think it is any worse and maybe even better than getting water from a lake, strean etc.
When and How to Treat Water for Storage
In an emergency, if you do not have water that you know is safe, it’s possible to purify water for drinking. Start with the cleanest water you can find and treat with one of the following methods:
· Boiling and chlorinating: Water can be purified by boiling. Boiling times may vary from state to state, depending on altitude. In Colorado, the water is safe to use once after it has been boiled for three to five minutes and has cooled. If you plan to store boiled water, pour it into clean, sanitized containers and let it cool to room temperature. Then add 5-7 drops, or 1/8 teaspoon, of chlorine bleach* per gallon of water (1/2 teaspoon per 5 gallons). Stir or shake the solution to mix it. Cap the containers and store them in a cool, dry place.
· Filtering and chlorinating: You can filter water if you have a commercial or backpack filter that filters to 1 micron. These are available in sporting good stores and are recommended for use when back-packing. They are not recommended to clean large volumes of water. Filtering eliminates parasites such as giardia and cryptosporidium, but it may not eliminate all bacteria and viruses. Therefore, it’s recommended that 5-7 drops (1/8 teaspoon) of chlorine bleach* be added per gallon of filtered water (1/2 teaspoon for 5 gallons). Stir or shake the solution to mix it. Wait 30 minutes before using the water, or cap the containers and store them in a cool, dry place.
*Use liquid household bleach that contains 5.25 percent hypochlorite. Do not use bleaches with fresheners or scents as they may not be safe to consume. The above treatment methods use a two-step approach so less bleach is needed, yet giardia and cryptosporidium are destroyed through boiling or eliminated by filtering. Chlorine may not be effective against these parasites. Since adding too much chlorine to water can be harmful, it’s important to be as accurate as possible when measuring. You can also get dry bleach from a pool supply. It goes a long way and is safer to use.
· Distillation Distillating involves boiling water and then collecting the vapor that condenses back to water. The condensed vapor will not include salt and other impurities. To distill, fill a pot halfway with water. Tie a cup to the handle on the pot’s lid so that the cup will hang right-side-up when the lid is upside-down (make sure the cup is not dangling into the water) and boil the water for 20 minutes. The water that drips from the lid into the cup is distilled.
Most water filtration devices are designed for use on microbiologically safe water. Don’t assume they are safe to use on contaminated water. Check with the manufacturer to be sure.
Use the following guidelines to determine if filtration equipment is adequate to use with microbiologically contaminated water:
Filtration Equipment Safe on Microbiologically Contaminated Water?
Carbon Filter- No
Reverse Osmosis- No
Deionization Filter- No
Pitcher Filter- No
Faucet Mount Filter- No
Steam Distiller Yes – but requires electricity
UV Sterilizer Yes – but requires electricity
Ceramic Filter Some – YES but only if rated for bacteriological protection
Equipment that is safe to use on contaminated water is often slow, costly, inconvenient and/or high maintenance. It makes the most sense to use the filtration equipment that best meets your normal daily needs and shift to water storage or alternative methods of water treatment in times of emergencies.
Purifying Water
· If water is polluted, strain through paper towels, paper coffee filters, or several layers of clean cloth into a container to remove any sediment or flaking material. Then boil the water vigorously for 10 minutes, as this will usually make it safe to drink. Add one additional minute for each 10,000 feet of altitude, depending on the area you live in. Jane has "water socks" for $10 each that will strain the debris out of water so that you can purify it without the chunks in it. Call her to get some. She gets these from a special source.
· Another method of purification is to strain the water as described above, and then to chemically purify it by adding liquid bleach or tincture of iodine.
· For clear water, use two drops of bleach or three drops of tincture of iodine per liter. If the water is cloudy, then these amounts should be doubled. Store an eye dropper with your emergency supplies, to be used only for this purpose.
· Mix thoroughly by stirring or shaking water in a container. Let the water stand for 30 minutes. A slight chlorine odor should be detectable. If not then the dosage should be repeated and the water allowed to stand for an additional 15 minutes.
· Liquid bleach loses strength over time. For this reason I mark each bleach container with the current date. If the bleach is one-year-old, double the amount. Two-year-old bleach should not be used.
· Water purification tablets will purify one liter of water. The tablets have a shelf life of two years and lose their effectiveness if them get damp.
· Purify enough water to last a maximum of 48 hours. Water allowed to sit for longer than this may become re-contaminated.
Prepare Containers
Thoroughly clean the bottles with dishwashing soap and water, and rinse completely so there is no residual soap.
Additionally, for plastic soft drink bottles, sanitize the
bottles by adding a solution of 1 teaspoon of non-scented liquid household chlorine bleach to a quart (1/4 gallon) of water. Swish the sanitizing solution in the bottle so that it touches all surfaces. After sanitizing the bottle, thoroughly rinse out the sanitizing solution with clean water.
Fill the container
Fill the bottle to the top with regular tap water. (If your water utility company treats your tap water with chlorine, you do not need to add anything else to the water to keep it clean.) If the water you are using comes from a well or water source that is not treated with chlorine, add two drops of non-scented liquid household chlorine bleach to each gallon of water.
Tightly close the container using the original cap. Becareful not to contaminate the cap by touching the inside of it with your fingers. Write the date on the outside of the container so that you know when you filled it. Store in a cool, dark place. One more important note: get a new hose to fill your water drums old ones have fungus and bacteria in them. We don't want this in water to be stored.
WAYS TO TREAT WATER
The instructions below are for treating water of uncertain quality in rare emergency situations in the absence of instructions from local authorities when no other reliable clean water source is available and you have used all of your stored water. If you store enough water in advance, you will not need to treat water using these or other methods.
Boiling is the safest method of treating water. In a large pot or kettle, bring water to a rolling boil for 5 full minutes, keeping in mind that some water will evaporate. Cover if you can. Let the water cool before drinking. Boiled water will taste better if you put oxygen back into it by pouring the water back and forth between two clean containers. This will also improve the taste of stored water. You will need alot of fuel for this method.
You can use household liquid bleach to kill microorganisms. Use only regular household liquid bleach that contains 5.25 to 6.0 percent sodium hypochlorite. Do not use scented bleaches, colorsafe bleaches, or bleaches with added cleaners. Because the potency of bleach diminishes with time, use bleach from a newly opened or unopened bottle. Add 16 drops (1/8 teaspoon) of bleach per gallon of water, stir and let stand for 30 minutes. The water should have a slight bleach odor. If it doesn’t, then repeat the dosage and let stand another 15 minutes. If it still does not smell of bleach, discard it and find another source of water.
Other chemicals, such as iodine or water treatment products (sold in camping or surplus stores) that do not contain 5.25 to 6.0 percent sodium hypochlorite as the only active ingredient, are not recommended and should not be used.
Distillation
While the two methods described above will kill most microorganisms in water, distillation will remove microorganisms that resist these methods, as well as heavy metals, salts, and most other chemicals.
Distillation involves boiling water and then collecting the vapor that condenses back to water. The condensed vapor will not include salt or most other impurities. To distill, fill a pot halfway with water. Tie a cup to the handle on the pot’s lid so that the cup will hang right-side-up when the lid is upside-down (make sure the cup is not dangling into the water), and boil the water for 20 minutes. The water that drips from the lid into the cup is distilled.
*****************
Homemade Water Filters
The key to making a homemade water filter is to having the right materials readily available. A homemade water filter can be made easily and inexpensively and can serve your immediate clean water needs.
Types of Homemade Water Filters
There are two schools of thought about homemade water filters when it comes to construction. The first is to create one with prefabricated parts accessible from online distributors. The other school of thought is to create your own components from everyday household items. In either case, the parts needed to make your own water filter are relatively easy to assemble.
A housing configuration will be needed to house the filtration system. Single, double, or triple filtration housing systems are available, a decision should be made on which would serve immediate filtration needs. Each housing configuration should include housing, stand, spout, diverter and all of the fittings.
Once the housing configuration has been chosen, the filters to be housed should be next. There are a few options in filters for homemade water filters. Activated_carbon is the most common type of filter. Charcoal particles tightly packed together create a network to catch unwanted particles such as lead and other contaminates.
Silver sterasyl ceramic is another type of filter. The compounds in this particular filter act upon more harmful bacteria and cysts such as giardia. However, due to their use of a proprietary silver impregnated ceramic for their microfilters, this type would be beyond the scope of most people looking to make homemade water filters.
Carbon block filters are the other of the basic type of water filtration systems. These types of filters contain powdered or solid carbon blocks. When water is forced through the carbon, it filters out all of the unwanted and harmful particulates and contaminates in water as well as unwanted chlorine and fluoride that can be added to municipal water supplies. Typically, carbon block filters boast a higher contaminant removal ratio.
Once the filter type has been chosen, simply slip the filter cylinder in the housing configuration, secure the housing to the countertop and hook the water lines to the plumbing. Once connected water should be allowed to flow freely through the filter line for five to ten minutes for clearance and proper filter activation.
Portable Water Filters
One other type of homemade water filter is far more portable and personal. The materials for this style of water filter are readily available and can be found easily in most households.
A two-liter plastic water bottle with the lid will serve as the housing for the filtration system. An ordinary plastic straw will serve as the spout. The filtration system will consist of cotton batting, fine and large grain gravel, fine and large grain sand, and a coffee filter. Activated charcoal granules may be added for an extra level of filtration. The filtered water can be captured in a mug or jar.
To create this style of homemade water filter, cut off the bottom of the two-liter water bottle. Create a hole in the lid of the bottle so that a straw may fit snugly. The straw must sit half way through the opening in the lid. This housing configuration will sit on the jar or mug with the straw end of the housing inside the jar.
Place the cotton batting at the bottom of the two-liter bottle, this will serve as the lining for your filtration system. Start with a layer of activated charcoal granules.
Next, place a layer of fine grain sand followed by a layer of large grain sand. Follow the layers of sand with a layer of fine grain gravel then larger grain gravel.
Alternate these layers until you reach the top of the bottle.
Top the filtration system with the coffee filter. Once the filtration system is in place, pour in the unfiltered water through the coffee filter. The untreated water will work through the layers of sediment to wick away the impurities in the water. The cotton batting catches particulates from the sediment and acts as a final buffer. The filtered water will flow through the straw spout into the jar for drinking. Adding a couple of drops of chlorine can add another level of filtration to the process.
***********************
WATER FILTER INSTRUCTIONS
In areas subject to fallout, about 99% of the radioactivity in water could be removed BY filtering the water through at least 8 inches of soil taken from 8 inches "Below" the surface. That soil has not been leached of the "clay" particles in the soil "needed to attract the radioactivity" in the water. SANDY soil will not work as a filter because it lacks the necessary soil "clay". Most homes and flowerbeds have enough clay in the soil to work as a filter. Kids play clay does NOT work at all. It has to be soil clay
Get yourself a 5-gallon can, trashcan, bucket, wastebasket, washtub, container. With a hammer and a nail not as big as pencil, punch about a dozen holes in the bottom of the can, punch the holes from the bottom up into the can. Make the holes near the center, in a ring, or circle. Wad up some coat hangers, about a dozen. Put a couple of washcloths in the bucket bottom and the coat hangers on top of them. OR you can just use a bunch of silverware, enough for 6 or 8 people. Knives, forks, spoons. You are creating a void space. Then a bath towel with the ends hanging out over the sides of the bucket.
Put a couple of shovel full's of dirt in the bucket, spread it out even, then some more until it is 8 inches deep in the bucket. Fold-over the towel ends into the bucket, and smooth out the wrinkles as best as you can. Then put a couple more washcloths on top of the waded towel. Pour the contaminated water in slowly and let it soak down through your filter creation. Put your marvelous water filter in another larger can or bucket, standing on some glasses or a couple of food cans or bricks to hold it up. Every 10 Gallons of dirty, OR CLEAN, contaminated water you need to change the soil. WHY? Answer is "BECAUSE" the "clay" in the soil has absorbed the radiation in the water and the clay can't absorb any more. Just like a sponge when it's full, can't hold any more water. "Clay" can only hold so much fallout gamma rays. You take the soil from down below the fallout out in the yard, at least 8 inches deep and you will have enough soil to filter a lot of water, to keep you alive.
If you do not get the radiation "OUT" of water, you are killing your insides and your brain won't know it for two weeks. You are dead.
Then you have to kill the germs in the filtered water, BEFORE you drink it. What is best is to prepare.
******************
There are many commercial water filters available for your home and also portable ones. Look them over before you buy.
ASAP silver solution -one bottle will clean 6.5 gals on water.
Xpack water filter -see online-- made for the military to use. Comments are they are very good. they are light to carry and will give a 10 day water supply. They sell for about $63. Available at Costco also.
I hope this helps answer the WATER questions. As always leave your questions (just click on comments below each post) on this blog or call and we'll get you an answer!!
NEXT WEEK: HOW TO MAKE A SOLAR STILL this is another great way to clean and gather water. Come See!
Thursday, February 11, 2010

Preparedness Project - Paint Can Heaters or cooker

1 New Gallon-Sized Paint Can with Lid
1 New Quart-Sized Paint Can with Lid1 Roll of Toilet Paper (cheap toilet paper works best)
1 Small Box of Matches
1 Paint Can Opener or a Coin
1 Bottle of Alcohol
1 4x4 Tile
1 Bottle Opener
Label and Instructions (PDF included below)


sized paint can.


Push it all the way down into the can.

I used 16 ounces.

very easily once the toilet paper has been saturated.

Place the lid on the quart can.
Make sure it is tightly closed!

Use a sharp bottle opener to keep from denting the can.

just push it back out with your fingers.
Make sure you watch the sharp edges.


Place the above items into the gallon-sized paint can and seal the lid.
To use the heater or camp stove:


Note:
The toilet paper won't burn, and so when your alcohol burns out - just refill it!
Saturday, February 6, 2010
Sanitation Needs-We don't want our soil, air and water contaminated!! Worse yet diseases as a secondary problem!
Jane's clothes washer, portable toilet & wonder box

Display of needed sanitation items
This week was again filled with important information needed in a survival situation. Without proper sanitation we will get illness, parasites, and diseases that will make us wish we had followed the sanitation rules. In fact without proper sanitation we may not live long enough to use our food storage items. The lack of sanitation can create secondary problems within 48 hours! That is quick!! Let us learn from others. Look at the Katrina situation, the floods of the Midwest and the current Haiti earthquake. We would have like problems if we had an earthquake, flood or other disaster here.
We learned how to deal with toilets not working, waste disposal, proper ways to deal with garbage and trash, controling insects and rodents, keeping odors under control, and personal hygiene. We need to know these things to keep ourselves and others from getting sick.
It is necessary to keep our hands, body and mouth clean even when the water is limited. We talked about the ways we can do this with little water. We also discussed the items necessary to store to accomplish these things. Jane brought in her little clothes washer to show us along with her portable toilet. We showed other ways to wash clothes and provide a toilet if you did not own these items.
Also, the disinfectants that we need to have on hand to keep disease under control were talked about. Rod Larkin said he could get us the disinfectants we need, so if you don't have yours yet or need to add to them talk to Rod Larkin. Thanks Rod!! We appreciate it!
Sanitation is one of the critical components of preparedness!! If there is a flu quarentine who is going to maintain sewage, garbage pick-up, etc? If there is a financial crisis worse than what we have now- how will the communities afford to dispose of our waste? We need to take emgerency sanitation seriously or the consequences could be dire! We do not want our soil, air and water to be contaminated!! Water will be limited so it is especially important to not contaminate it.
If you need information on this subject please contact me.
We had some questions about a Wonder Box, which is a way to cook foods with little energy. There will be a complete forum on this on Oct 28 when we will learn alternative ways to cook. However, Jane brought her Wonder Box filled with a pot of cooked beans to show us how it works. The beans were cooked in about 6 hours in this box without the use of fuel!! These boxes are now available for the cost of $35.00. If you are interested please call Jane Jensen (801) 546 0303.
The next forum will be on water and water filteration. We all need to know about this. If you have a filteration system you would like to share please bring it with you---Thanks! See ya Thursday @ 7 pm in the room next to the kitchen.
Subscribe to:
Posts (Atom)